
To add custom CSS in WordPress, open Appearance then Editor, click the Styles panel, and paste your code into the Additional CSS box. That box lives in the Site Editor on any modern block theme, and it applies your styles across the whole site at once. On an older classic theme you’ll find the same thing under Appearance then Customize then Additional CSS instead. Both options save your CSS with the theme, so it loads on every page without you touching a single file.
One thing trips people up before they even start. If you run a self-hosted WordPress site, the kind you install yourself on your own hosting, custom CSS is completely free and built in, and the Additional CSS box is right there with no upgrade required. On WordPress.com’s hosted plans the same feature sits behind a paid tier, which is why some tutorials open by telling you to upgrade first. This guide covers the self-hosted version that most site owners run, so you won’t need to buy anything to follow along.
There are five real places custom CSS can live in WordPress, and each one suits a different situation. Some are quick and beginner-friendly, while others survive theme changes and updates far better. We’ll walk through all of them, show you how to find the exact selector for the element you want to change, and hand you a set of snippets you can copy straight into your own site.
Before you write a line of it, though, it helps to know that WordPress itself treats custom CSS as a fallback. Since version 6.2 the block editor added its own CSS box carrying a note that calls it a last-resort option, meant for styling the design tools can’t handle yet. Modern blocks and block themes let you change colors, spacing, and fonts visually, so a lot of what people once reached for CSS to fix can now be done with a few clicks. Custom CSS is still worth knowing well, and this guide makes it painless on the days you do need it.
What is custom CSS in WordPress, and when should you use it?

Custom CSS in WordPress is your own styling code that overrides the default look your theme ships with. CSS, short for Cascading Style Sheets, is the language every website uses to control colors, fonts, spacing, borders, and layout. Your theme already comes with a full stylesheet that decides how everything appears. When you add custom CSS, you’re writing extra rules that sit on top of the theme’s rules and win where the two overlap, so a button turns the shade you want or a heading gets a little more room to breathe.
You reach for custom CSS when the built-in controls can’t get you the exact result you’re after. Maybe your theme has no setting to hide one particular page title, or you want a single button styled differently from all the others, or you need a tweak that only kicks in on phones. Those are the moments CSS earns its place, because it can target almost anything on the page with real precision that a general setting can’t match.
There are also times you genuinely shouldn’t reach for it. If you only want to change your body font or your brand colors across the whole site, the Styles panel in the Site Editor does that visually and keeps everything consistent for you. Plugin and block settings now handle most spacing and alignment too. Reaching for CSS to do a job the interface already offers usually creates more work later, since you then have to remember where that stray rule lives when something looks off. A good habit is to try the visual controls first and drop down to CSS only when they run out of road.
This is where the blocks you build with really matter. Blocks that ship with rich design controls, like the ones in a capable DigiBlocks layout, let you set typography, padding, borders, and responsive behavior straight from the sidebar. The more your blocks can do visually, the less custom CSS you’ll ever have to write, and the easier your site stays to hand over to someone else later.
Where do you add custom CSS in WordPress?

Custom CSS in WordPress can live in five different places, and picking the right one saves you real headaches down the line. The five homes are the Site Editor, the Customizer, a single block’s own CSS box, a child theme stylesheet, and a dedicated CSS plugin. They differ mainly in how permanent they are and how much control each one hands you.
The Site Editor is the natural home for custom CSS on any modern block theme. Go to Appearance then Editor, open the Styles panel from the icon in the top right, click the three-dot menu, and choose Additional CSS. Anything you paste there applies across the whole site and saves with your theme’s global styles. This is the spot most people should use for general tweaks, and it’s the box WordPress introduced in version 6.2 as part of full site editing to replace the old Customizer field.
The Customizer holds that same Additional CSS box, but you’ll only see it on classic themes now. Head to Appearance then Customize then Additional CSS and you get a live preview beside the code as you type each line. If your site still runs a classic theme rather than a block theme, this is your main option, and it behaves exactly the same way in practice once you’re in it.
A single block can also carry its own CSS. When you select a block in the editor, open the Styles tab in the sidebar and look for the Additional CSS field tucked under the block’s advanced options. Rules you write there apply to every copy of that block type, which is handy when you want all your buttons or all your quote blocks styled a certain way without hunting them down one by one.
A child theme stylesheet is the sturdiest home for CSS once you’re comfortable editing files. A child theme is a small companion theme that inherits everything from your main theme but lets you override pieces of it safely. You add your rules to its style.css file, and they survive parent-theme updates and even carry over if you rebuild the site later. It takes a little setup, so this route is aimed at developers or anyone planning heavier customization.
A CSS plugin is the fifth route, and its big advantage is that your code stays put no matter which theme is active. Free options like Simple Custom CSS or a code-snippets plugin store your styles in the database instead of inside the theme. If you switch themes often, or you simply want your CSS kept separate from everything else, a plugin stops it from vanishing the day you change your design. To keep the choice simple, here is how to decide fast.
- General, site-wide tweaks on a block theme go in the Site Editor.
- The same tweaks on a classic theme go in the Customizer.
- A change to one whole block type belongs in that block’s own CSS box.
- Heavy or permanent styling belongs in a child theme.
- CSS you want to survive theme swaps belongs in a plugin.
How do you find the right CSS selector to target?
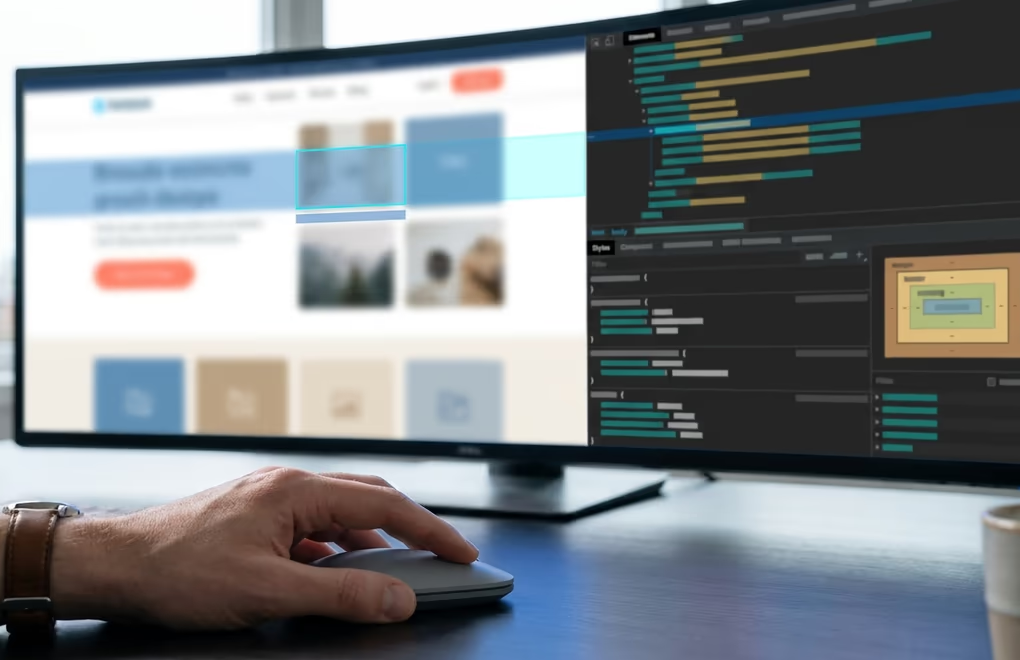
You find the right CSS selector by inspecting the element in your browser, which shows you the exact class name to target. Every button, heading, and image on your site carries a class, and your CSS needs that class to know what it should style. Guessing wastes time and usually misses, so the reliable way is to let the browser tell you precisely what’s there.
Open your site in Chrome, Firefox, or Edge, right-click the thing you want to change, and choose Inspect. A panel opens showing the page’s HTML on one side and its active styles on the other. As you hover over a line of that HTML, the browser highlights the matching element on the page, so you can confirm you’ve grabbed the right one before you write anything. Look for the class attribute, which for a standard WordPress block usually starts with wp-block, and that class is what goes into your CSS.
Say you want to restyle your buttons. Inspect one and you’ll most likely see it uses the class wp-block-button__link. That tells you a rule beginning with .wp-block-button__link will reach every button on the site, and the dot in front is what marks it as a class rather than a tag. If you only want to change one specific element instead of all of them, you can add your own class to that single block first, through the Advanced section of the block sidebar, then target that unique name in your CSS.
The inspector also explains why a rule sometimes refuses to apply. The styles panel shows which rules are winning and which are crossed out, so if your CSS looks ignored, you can actually see the theme rule that’s beating it. That usually means you need a more specific selector rather than more code piled on top. It’s the single most useful skill for writing CSS that actually sticks, and it takes about five minutes of poking around to get comfortable with.
Which custom CSS snippets are worth copying?

The most useful custom CSS snippets handle the small jobs the interface still makes awkward, like recoloring every button at once or hiding an element you can’t switch off. Each one below targets a standard WordPress block class, so you can paste it into your Additional CSS box and adjust the values to fit your site. Swap the color codes for your own brand colors, and change a class name if the inspector shows you something different on your theme. Here are five that cover the requests site owners make most often.
- Recolor every button by targeting the button class, for example .wp-block-button__link { background-color: #0a0b0e; color: #ffffff; }
- Hide a page title you don’t want shown with .wp-block-post-title { display: none; }
- Add breathing room above a section using .wp-block-group { margin-top: 3rem; }
- Make one area’s text larger by giving it a class and writing .lead-text { font-size: 1.25rem; }
- Shrink a heading only on phones with @media (max-width: 600px) { .wp-block-heading { font-size: 1.5rem; } }
That last snippet is worth understanding, because a media query is how you make your site behave differently on small screens. The rule inside only runs when the browser window is 600 pixels wide or less, which covers most phones held upright. You can put any normal CSS inside it, so a heading that looks huge on mobile gets shrunk without affecting the desktop view at all. Responsive tweaks like this are one of the few jobs where custom CSS still beats the visual controls, since block settings don’t always expose a separate value for phones.
Whenever you paste any of these, add them one at a time and save between each so you can watch the effect and catch a typo early. A single missing bracket can quietly stop every rule after it from working, and adding your changes gradually is what makes that mistake easy to spot before it piles up.
How do you keep custom CSS from breaking your site?

You keep custom CSS from breaking your site by putting it somewhere permanent, testing changes gradually, and clearing your cache whenever something looks off. CSS can’t harm your database or take a site down the way a bad plugin can, so it’s low-risk by nature, but sloppy habits still cause hours of confusion. A few plain practices keep the whole thing clean and predictable.
The first is choosing a home that survives change. CSS you add in the Customizer’s Additional CSS box is tied to the active theme, so switching themes leaves it behind and your styling suddenly vanishes. If a tweak matters for the long run, a child theme or a CSS plugin holds onto it through updates and redesigns, even if you move to one of the best block themes later on. For a quick experiment the Customizer is fine, but don’t build your whole look there and forget it’s bound to that one theme.
The second is remembering caching before you panic. If you change a rule and nothing happens on the front end, a caching plugin or your host’s own cache is probably still serving the old version of the page. Clear it, then reload with a hard refresh, and your new styles should appear as expected. This one catches almost everyone at least once, so check it before you assume your CSS itself is wrong.
The third is writing specific rules instead of forcing them. When a style refuses to apply, it’s tempting to slap an important flag on the end to win the fight outright. That works, but it makes every future change harder, because you then have to out-shout your own rule each time you touch it. A cleaner fix is a more specific selector, which the browser inspector helps you find in seconds. Save the important flag for the rare case where genuinely nothing else works.
The last is testing safely, especially for anything bigger than a small tweak. If you’re editing a child theme’s files directly, keep a backup so a broken edit is a quick undo rather than a scramble to remember what you changed. For larger design work, a staging copy of the site lets you try things out without your visitors ever seeing the mess. Small edits through the Site Editor are easy to reverse, so save most of your caution for the file-level work.
When custom CSS is the wrong tool
Custom CSS is a precise tool, and the best-run sites use it sparingly rather than as a first move. WordPress itself flags its CSS box as a last resort for good reason, since every rule you add is one more thing to remember and maintain when your design shifts. If you find yourself writing dozens of rules just to force a theme into shape, the real fix is usually a different theme or better blocks, not more code layered on top. A well-built block theme paired with capable blocks handles colors, fonts, spacing, and responsive layout from simple controls, and it keeps that styling consistent without a stylesheet to babysit. Themes like DigiFlash and DigiFusion are built around those visual controls, so most everyday styling never touches custom code at all. Keep custom CSS for the genuine gaps, the one-off tweaks and the mobile adjustments the interface simply can’t reach, and your whole site stays far easier to run over time.




0 Comments on "How to Add Custom CSS in WordPress"