If you’ve been wondering how to start a WordPress blog, you’re looking at the right platform in 2026. It powers 42.6% of all websites on the internet, which means nearly half the web runs on the same software you’re about to install. That kind of adoption isn’t an accident, it’s the result of two decades of open-source development, a plugin ecosystem with over 61,000 free options, and a community that genuinely wants to help newcomers succeed.
But most “how to start a blog” guides won’t tell you: the way people build WordPress sites has fundamentally changed. If you follow an outdated tutorial, you’ll end up installing a classic theme, hunting for a page builder plugin, and stitching together a design workflow that WordPress itself has moved past. The block editor and Full Site Editing aren’t experimental features anymore. They’re the default, and they’ve been the default since WordPress 5.9 shipped back in 2022.
This guide teaches you how to start a WordPress blog the modern way. You’ll use a block theme, customize your site through the Site Editor, and build pages with reusable patterns instead of relying on third-party page builders that add weight and complexity. The result is a faster, cleaner blog that’s fully aligned with where WordPress is heading especially with WordPress 7.0 arriving on April 9, 2026, which doubles down on block-based editing and introduces real-time collaboration features.
Whether you want to document your expertise, build an audience around a topic you care about, or create a side income through affiliate marketing and digital products, this guide walks you through every step. We’ll cover hosting, domain setup, theme selection, design customization, writing your first posts, essential plugins, SEO basics, and the legal stuff most tutorials skip entirely. By the end, you’ll have a fully functional blog that looks professional, loads fast, and is ready for readers.
Pick a Niche That Has Room to Grow
 1")
Before you buy hosting or pick a domain name, you need to decide what your blog is actually about. This sounds obvious, but it’s where most new bloggers either overthink things or don’t think enough. The sweet spot is a niche that sits at the intersection of three things: something you genuinely know about (or are willing to learn deeply), something other people are actively searching for, and something that has monetization potential down the road.
You don’t need to be the world’s foremost expert on your topic. You just need to be a few steps ahead of your readers and committed to staying there. A personal finance blog written by someone who’s been managing their own investments for five years is plenty credible. A food blog from someone who cooks every day and photographs the results is more than enough.
To validate your niche before committing, try this: open Google and type your main topic followed by common blog post formats like “best,” “how to,” or “guide.” If Google autocompletes with dozens of suggestions, that’s real search demand. Then check whether other blogs in that space are running ads, promoting affiliate products, or selling their own courses. If they are, the niche has proven monetization paths. If you can only find a handful of blogs with no visible revenue model, that’s a warning sign.
Don’t worry about the niche being “too competitive.” Competition means money. The key is finding an angle within a competitive niche that isn’t fully covered. Maybe the personal finance space is crowded, but personal finance for freelancers in Europe isn’t. Maybe there are thousands of food blogs, but very few focus specifically on high-protein vegetarian meal prep. Your unique perspective is what makes you stand out, not picking an empty category that nobody cares about.
Choose Hosting and Register Your Domain
 2")
Your hosting provider is where your blog physically lives on the internet. When someone types your domain name into their browser, the hosting server delivers your website files to their screen. This isn’t something you can skip or cheap out on without consequences slow hosting means slow pages, and slow pages mean readers leaving before they’ve read a single word.
For a new blog, shared hosting is perfectly fine. You’ll typically pay between $3 and $10 per month, and the major providers all include one-click WordPress installation, a free SSL certificate, and enough storage to run a blog without issues. The most popular options right now include Hostinger (starting at $1.79/month with frequent promotions), Bluehost (officially recommended by WordPress.org), and SiteGround (consistently top-rated for speed and support).
When choosing a hosting provider, pay attention to the renewal price, not just the introductory offer. A plan that costs $2.99/month for the first year might jump to $11.99/month when it renews. That’s standard practice across the industry, so factor the full cost into your decision. Also make sure your host supports PHP 8.2 or higher, since WordPress 7.0 (launching April 9, 2026) will require PHP 7.4 as a minimum and recommends PHP 8.3.
For your domain name, keep it short, memorable, and easy to spell. Avoid hyphens, numbers, and unusual TLDs that make people second-guess the URL. A .com domain is still the safest choice for credibility, though .co, .io, and niche-specific extensions like .blog have gained acceptance. Most hosting providers include a free domain for the first year, so you can register it during the hosting signup process. If you want to buy the domain separately, Namecheap and Cloudflare Registrar both offer competitive pricing with no markup on renewals.
Install WordPress and Choose a Block Theme
 3")
Every major hosting provider offers one-click WordPress installation these days. Log into your hosting dashboard, find the WordPress installer (usually under “Website” or “Apps”), click install, and you’ll have a working WordPress site within minutes. The current stable version is WordPress 6.9.1, released February 2026 with 49 bug fixes.
Now comes the decision that will shape your entire blogging experience: choosing between a classic theme and a block theme. This is where most outdated guides lead you astray. Classic themes rely on the old WordPress Customizer and often need page builder plugins like Elementor or Beaver Builder to create custom layouts. Block themes use WordPress’s built-in Site Editor, which lets you customize your entire site headers, footers, templates, archive pages, everything using the same drag-and-drop block system you’ll use to write posts.
Block themes are the clear winner for new blogs in 2026. They’re faster because they don’t need heavy PHP processing the styling comes from a lightweight theme.json configuration file instead. They’re more future-proof because WordPress’s development roadmap is entirely focused on block-based editing. And they don’t require any third-party page builder plugins, which means fewer dependencies, fewer potential conflicts, and a lighter overall site. Over 40% of themes in the WordPress.org directory are now optimized for the block editor, so you have plenty of options.
For a blog that needs to load fast and look polished right out of the box, DigiFlash is worth a serious look. It’s a Full Site Editing theme built specifically for performance, with 0.3-second load times, 60+ pre-designed block patterns, and zero jQuery dependencies. The free version on WordPress.org gives you everything you need to launch, while the Pro version adds AI content tools and a custom code snippets manager if you want more control down the line. You can also check our roundup of the best WordPress block themes to compare your options.
To install your chosen theme, go to Appearance > Themes > Add New Theme in your WordPress dashboard. Search for the theme by name, click Install, then Activate. If you’ve downloaded a premium theme as a .zip file, use the “Upload Theme” button instead. Once activated, you’ll see a new “Editor” option under the Appearance menu that’s the Site Editor, and it’s where you’ll do most of your design work.
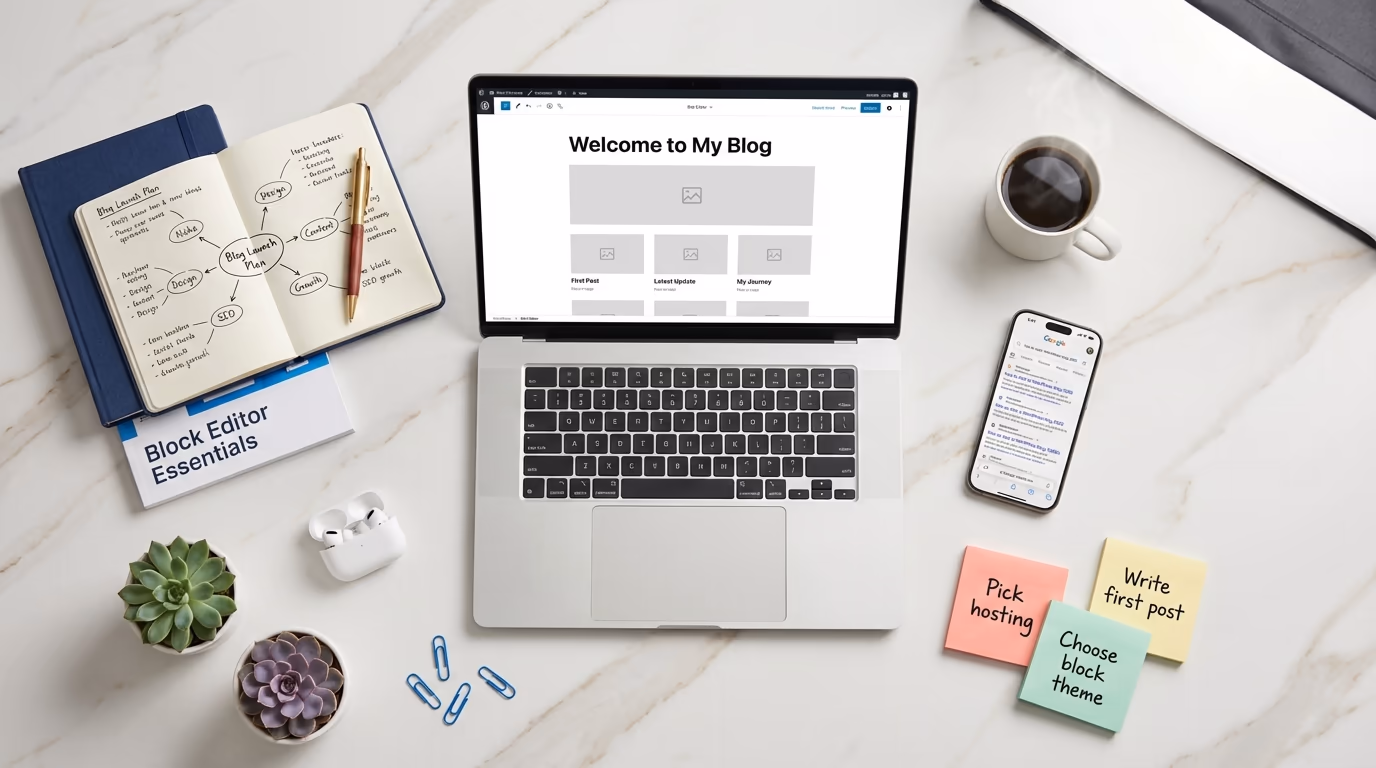
Customize Your Blog With the Site Editor
 4")
The Site Editor is where block themes really shine, and it’s probably the biggest reason to go the block theme route as a new blogger. Open it by navigating to Appearance > Editor in your WordPress dashboard. You’ll see a visual representation of your site that you can click into and edit directly. No code, no separate customizer panel, no guesswork about what goes where.
Start with Global Styles. Click the half-moon icon in the top-right corner of the Site Editor to access your site-wide design settings. This is where you set your color palette, typography, button styles, and spacing defaults. Every change you make here cascades across your entire site, so you only need to pick your fonts and colors once. Choose two fonts at most one for headings and one for body text and stick to a color palette of 3-5 colors. Consistency is what makes a blog look professional, not complexity.
Next, edit your templates. The Site Editor’s left sidebar lists all your templates: Homepage, Single Posts, Archive, 404, Search Results, and more. Click any template to open it and start rearranging blocks. Your blog homepage template, for example, might include a header with your logo and navigation, a hero section with a featured post, a grid of recent posts, and a footer with links and a newsletter signup. You build all of this by dragging blocks into position, just like assembling a document.
Block patterns speed this process up dramatically. Instead of building every section from scratch, you can insert pre-designed patterns complete sections like hero areas, testimonial grids, call-to-action banners, or blog post layouts and then customize them to match your brand. If you’re using DigiFlash, you get 60+ patterns built in. For even more block options, a plugin like DigiBlocks adds 25+ free blocks (60+ in the Pro version) that extend what the default editor can do, from advanced image galleries to custom spacing controls.
Don’t forget to set up your navigation menu. In the Site Editor, click on your header area and you’ll find a Navigation block. Add your main pages here: Home, About, Blog, Contact. Keep it simple at launch you can always add more links later as your content library grows. If you want a deeper understanding of how blocks and patterns work together, our guide on what a Gutenberg block plugin is and how to use it covers the fundamentals.
Build Your Blog’s Essential Pages
 5")
Before you start publishing blog posts, you need a handful of static pages that give your site structure and credibility. These pages don’t change often, but they’re what turn a random blog into something that feels like a real website. Most new bloggers skip these entirely, which is a mistake that hurts both your SEO and your readers’ trust.
Your Homepage is your blog’s front door. Go to Settings > Reading and decide whether you want your homepage to show your latest posts (a traditional blog layout) or a static page (a custom landing page). For most bloggers, a static homepage that features your best content with a clear value proposition works better than a reverse-chronological post feed. You can always create a separate “Blog” page that displays your posts using the Query Loop block.
Your About page is often the second most-visited page on a blog after the homepage. Write it in first person, explain who you are, why you started the blog, and what readers can expect to find. Include a photo of yourself if you’re comfortable with it faces build trust faster than logos. Keep it conversational, not corporate. This isn’t a LinkedIn profile.
You also need a Contact page. At minimum, include an email address or a simple contact form. WPForms and Jetpack Forms both offer free tiers that handle basic contact forms well. And before you launch, create a Privacy Policy page WordPress actually generates a draft for you under Settings > Privacy. If you’re going to run analytics, ads, or email marketing (and you probably will), a privacy policy isn’t optional. It’s a legal requirement in most jurisdictions, and Google AdSense won’t even approve your site without one.
If you plan to use affiliate links or accept sponsored content (even eventually), you should also add a Disclosure page. The FTC requires bloggers in the US to clearly disclose material relationships with brands, and similar regulations exist across Europe, Australia, and Canada. A simple page explaining that some links on your site are affiliate links and you may earn a commission is all it takes. Put it up now and you won’t have to worry about retroactively adding disclosures to every post later.
Write and Publish Your First Blog Posts
 6")
With your site set up and your pages in place, it’s time to actually write something. Go to Posts > Add New Post and you’ll land in the WordPress block editor. Everything you type is a block paragraphs, headings, images, lists, quotes, embeds. Hit Enter to create a new paragraph block, type / to search for a specific block type, and use the toolbar at the top of each block to format text or change block settings.
Don’t agonize over your first post being perfect. It won’t be, and that’s fine. What matters more is getting into the habit of publishing consistently. That said, you should approach your first 5-10 posts strategically. Your first posts are the foundation of your content library. Each post should target a specific topic that your ideal reader is searching for, and together they should cover the core pillars of your niche.
For example, if your niche is WordPress tutorials, your first batch of posts might include a beginner’s guide to the block editor, a comparison of popular themes, a walkthrough of essential plugins, and a few problem-solving posts that answer specific questions people are Googling. This approach builds what SEO professionals call topic clusters interconnected content that signals to Google that your site has depth and authority on a subject.
Before you hit Publish on each post, take care of a few things. Set a featured image this appears in your blog feed, social media shares, and search results. Write a compelling excerpt (the short summary that shows up in post listings). Choose the right category for the post, and add 3-5 relevant tags. Set your permalink to something short and keyword-rich by editing the URL slug in the post settings panel.
A quick note on post length: there’s no magic number. Some topics need 800 words, others need 3,000. The right length is whatever it takes to thoroughly answer the reader’s question without padding. Google rewards comprehensiveness, not word count for its own sake. If you can cover a topic completely in 1,200 words, don’t stretch it to 2,500 with filler paragraphs that repeat the same points.
Install the Plugins Your Blog Actually Needs
 7")
Plugins extend what WordPress can do, and the temptation is to install dozens of them right away. Don’t. Every plugin you add is code that runs on your server, and too many plugins slow your site down, create security vulnerabilities, and increase the chances of conflicts. Start with the essentials and add more only when you have a specific need.
SEO plugin: You need one, and Rank Math or Yoast SEO are the two serious options. Both have generous free versions. An SEO plugin handles your meta titles and descriptions, generates sitemaps, manages schema markup, and gives you on-page optimization suggestions while you write. Install one of these before you publish your first post so that every piece of content is optimized from day one.
Security plugin: Wordfence or Sucuri Security are both solid free options. They add a firewall, malware scanning, and login protection. WordPress is inherently secure when kept updated, but a security plugin adds layers of defense against brute-force attacks, which are common even on brand-new sites. You’d be surprised how quickly bots start probing a fresh WordPress installation. Our WordPress security guide covers 20 best practices if you want to go deeper.
Caching plugin: WP Super Cache or LiteSpeed Cache (if your host supports it) dramatically improve page load times by serving static versions of your pages instead of generating them from the database on every visit. Some managed hosting providers like Kinsta and WP Engine include server-level caching, so check whether your host already handles this before installing a separate plugin.
Backup plugin: UpdraftPlus is the most popular free option and works well for most blogs. Set it to run automatic weekly backups and store them somewhere off your server Google Drive, Dropbox, or Amazon S3. Your hosting provider probably does backups too, but having your own independent backup means you’re never dependent on a single point of failure.
Cookie consent: If your blog has any readers in the EU (and it will, since the internet is global), you need a cookie consent solution for GDPR compliance. DigiConsent handles this cleanly with geolocation targeting for 195 countries, Google Consent Mode v2 support, and zero external scripts everything runs on your own server, which is exactly what a privacy tool should do.
That’s five plugins to start with. Resist the urge to add more until you’ve published at least 10 posts and have a clear understanding of what your blog actually needs. You can always add an email marketing plugin, analytics, social sharing buttons, or advanced block plugins later when the need is real rather than hypothetical.
Set Up Basic SEO So Google Can Find You
 8")
SEO can feel overwhelming when you’re just starting out, but the basics are straightforward and the payoff is massive. Organic search traffic is free, it compounds over time, and it’s the most sustainable way to grow a blog. You don’t need to become an SEO expert overnight, but getting the fundamentals right from the start saves you from having to fix things later.
First, make sure your site is visible to search engines. Go to Settings > Reading and confirm that the “Discourage search engines from indexing this site” checkbox is unchecked. This is checked by default on some hosting setups, and forgetting to uncheck it is one of the most common reasons new blogs don’t appear in Google.
Next, set your permalink structure. Go to Settings > Permalinks and select “Post name.” This gives you clean, readable URLs like yourblog.com/how-to-start-a-wordpress-blog instead of yourblog.com/?p=123. Clean URLs are better for both SEO and usability. Do this before you publish anything, because changing permalink structures later breaks all your existing URLs and requires redirects.
Sign up for Google Search Console (it’s free) and submit your sitemap. Your SEO plugin generates the sitemap automatically it’s usually at yourblog.com/sitemap_index.xml. Search Console shows you which queries are bringing people to your site, which pages are indexed, and any technical issues Google finds when crawling your content. It’s the single most useful free tool for understanding your blog’s search performance.
For each blog post you write, do some basic keyword research. You don’t need expensive tools Google’s own autocomplete suggestions, the “People also ask” boxes, and the related searches at the bottom of results pages all reveal what people are actually searching for. Use your target keyword naturally in the post title, the first paragraph, at least one H2 heading, and a few times throughout the body text. Your SEO plugin will guide you through this process with real-time feedback as you write.
Also, set a realistic timeline for seeing results. New blogs typically take 3-6 months before Google starts sending meaningful organic traffic. Search engines need time to discover, crawl, and trust a new domain. Publishing consistently during this period is crucial because it signals to Google that your site is active and worth indexing regularly. Don’t get discouraged by low traffic numbers in the early months that’s completely normal, not a sign that something is broken.
Grow Your Audience Beyond Search
 9")
SEO is a long game, and you shouldn’t rely on it as your only traffic source, especially in the early months. Building an audience means showing up where your potential readers already spend their time and giving them a reason to visit your blog.
Start an email list from day one. Even if you only have 10 subscribers, those 10 people are worth more than 1,000 social media followers because you own the relationship. An algorithm change can tank your social media reach overnight, but nobody can take your email list away from you. MailerLite and Brevo both offer free plans that handle up to 500 subscribers, which is more than enough to get started. Add a simple signup form to your sidebar, your About page, and at the bottom of every blog post.
Pick one or two social platforms and actually participate there. Don’t try to be everywhere at once. If your blog is about design or food, Pinterest and Instagram make sense. If it’s about business, tech, or professional topics, LinkedIn and Twitter/X are better fits. The key is to share your content in a way that adds value to the platform, not just drop links and disappear. Join relevant groups, answer questions, comment on other people’s posts, and build genuine connections with people in your niche.
Guest posting is another effective strategy, especially for new blogs. Writing a guest post for an established blog in your niche puts your name in front of an audience that’s already interested in your topic. You usually get an author bio with a link back to your site, which drives referral traffic and helps with SEO. Start by identifying 5-10 blogs in your niche that accept guest contributions and pitch them specific topic ideas that fill a gap in their existing content.
Engage in communities where your readers hang out. Reddit, Facebook Groups, Discord servers, and niche forums are all places where people ask questions you can answer with your expertise. Don’t spam your links genuinely help people, and mention your blog only when it directly answers their question. This kind of organic, helpful participation builds trust faster than any marketing tactic.
Turn Your Blog Into a Revenue Stream
 10")
Making money from a blog is entirely possible, but it takes time and traffic before the numbers make sense. Most successful bloggers don’t earn significant income until they’re consistently getting 10,000+ monthly pageviews, which typically takes 6-12 months of steady publishing. That said, it’s smart to understand your monetization options early so you can create content that naturally supports them.
Display advertising is the most passive monetization method. Google AdSense is the entry point you’ll need some content and traffic before they approve your application, but there’s no strict minimum. Once your traffic grows to 50,000+ sessions per month, premium ad networks like Mediavine and Raptive (formerly AdThrive) offer significantly higher RPMs (revenue per thousand impressions). The trade-off is that ads slow down your site and affect user experience, so find a balance that doesn’t drive readers away.
Affiliate marketing is where many bloggers earn the most. You recommend products or services you genuinely use, include special tracking links in your posts, and earn a commission when readers buy through those links. Amazon Associates is the most well-known program, but niche-specific affiliate programs often pay significantly better. If you blog about WordPress, for example, hosting companies, theme shops, and plugin developers all run affiliate programs with commissions ranging from $50 to $200+ per sale.
Digital products are the highest-margin option. Once you’ve built authority in your niche, you can create and sell ebooks, templates, courses, printables, or any downloadable resource that solves a specific problem for your audience. The beauty of digital products is that there’s no inventory, no shipping, and near-zero marginal cost you create it once and sell it indefinitely. If you go this route, our guide to selling digital products on WordPress covers the full setup, including which plugins handle file delivery, payment processing, and license management.
Sponsored content and services become viable once you’ve established authority. Brands will pay you to write reviews, tutorials, or mention their products to your audience. And if your blog demonstrates real expertise, you might find that consulting, freelance work, or coaching opportunities come to you organically. Your blog becomes a portfolio that proves you know what you’re talking about.
Your Blog Is Live Now Keep Going
You now have everything you need to launch a WordPress blog that’s built the right way for 2026. A block theme that’s fast and future-proof, a Site Editor workflow that doesn’t depend on third-party page builders, essential plugins that cover security, SEO, backups, and privacy, plus a content strategy that gives your first posts the best chance of ranking.
The bloggers who actually succeed are the ones who keep publishing after the initial excitement fades. Set a realistic schedule one well-researched post per week beats five rushed posts that you abandon after a month. Focus on helping your readers solve real problems, and the traffic, subscribers, and revenue will follow. WordPress gives you the tools. What you build with them is entirely up to you.
What’s your blog going to be about? If you’ve already got a niche in mind, start with step one and work through this guide at your own pace. And if you want to hit the ground running with a theme that’s optimized for speed and the block editor, give DigiFlash a try the free version has everything you need to launch today.
 11")


0 Comments on "How to Start a WordPress Blog in 2026 (The Block Theme Way)"